viewing photos:
Click on any thumbnail in your gallery to view the image larger.
Note: The filename & buy icon will disappear after a few seconds of inactivity. Hover over the image to pull that back up.

Saving your favorites:
The very first link in the email you received with your gallery should have been an Event link. While you can navigate to your gallery from my proofing webpage, the Event link is a little different. Clicking your Event link will take you to a page where you will have a button in the top right called "Register to Pick Favorites." Click that to get started. Anyone with access to this link can create their own favorites page without messing anything up for you.
I always make the Event & gallery passwords the same, but in case your password isn’t working, contact me.
Why use this feature?
Mainly this is for you to be able to quickly find your favorites. I easily deliver 1000+ images per wedding & this is a tool for you to tag your favorites. The shopping cart should also be enabled. Since I can’t create a coupon to a favorites gallery until after it’s been created by the client, any coupon you may receive from me may need to be updated to include your favorites page. Let me know if you can’t get a coupon to apply to an order.
I do have access to your favorites gallery, so this is a great way for you to send me your photo choices for your album or USB if you don't want to type out a list of file numbers.

A registration box will appear prompting you to enter your name & email address. After clicking "Register", don’t leave or refresh the page just yet. It should refresh automatically & prompt you to re-enter the password.
You will also receive an email confirmation & a new link. Don't lose that link!

The landing page will look the same except now your name will appear at the top & the heart button in the top right now reads "View My Favorites."
Click the gallery itself to view all of the photos & to begin ‘hearting’ photos.
Clicking “View My Favorites” will be empty if no photos have been ‘hearted’ yet. To get back to the full gallery, click the gallery name in the top left corner.

From here, the gallery looks the same except that each photo now has a little heart icon. Click the heart on any photo you want & it will automatically be added to your favorites. Hover a thumbnail to bring up the heart icon (as well as a few other options), or click a photo to view larger. The heart will be in the top right of your screen.

At any time, click "View Favorites" below the heart icon to view all of your favorites.

Your favorites page should open in the format pictured below. Please let me know if it doesn’t.
To view your favorite photos in a full-screen slideshow format, click the play button in the top right.
To remove any photo from your favorites, click the gallery name under the photo you want to remove & you will be redirected to the full gallery where you can un-heart there. (This is a current bug the company is working on fixing to make easier.)

buying photos:
To buy an image, select the photo you want & click on the "Buy" button in the bottom-right.
Horizontal photos will feature a ‘Buy Photo’ button in the bottom right corner which will convert into a shopping cart button for vertical photos.
purchasing single photos
Click "Paper Prints" or “Wall Art” to add a single photo to your shopping cart.
For each single print you choose, the dialogue box will walk you through the options, prices, & finishes available. Do this for each photo individually, or if you know you're buying multiple prints, try the Buy Multiple Photos option (keep reading for more).
Paper Prints // Standard prints on photographic paper, all standard sizes available
Wall Art // Large canvas wraps that come ready to hang, available in a few sizes only.
View Cart to check out.
Close to keep shopping.

purchasing multiple photos
Click "Buy Multiple Photos" to add multiple photos to your shopping cart. This is ideal if you're buying multiple photo in the same size.
Select the photos you want. Click again to remove your selection.
If you want five different photos all sized 4x6”, select your five photos & add to cart.
If you want five copies of the same photo sized 4x6”, select the one image & adjust the quantity to 5 & add to cart.
Click "Change Product" on the right to browse different products & sizes. The default product is a 4x6" print.
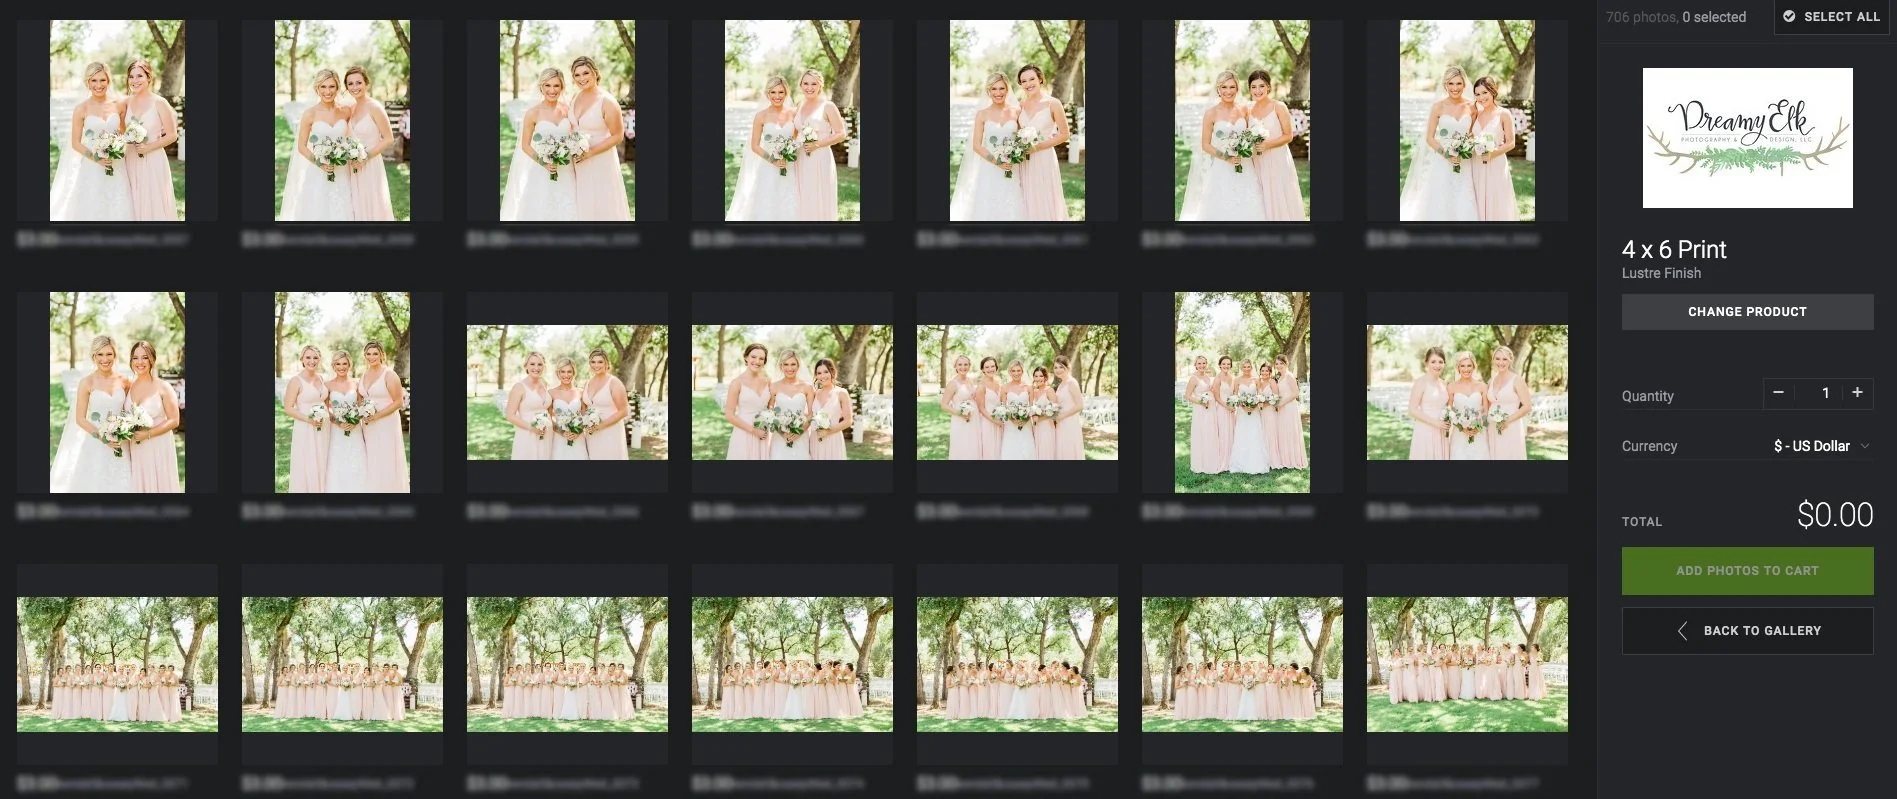
photo packages
Note: Photo packages are not currently supported on mobile devices. Please use a desktop.
Click "Buy Package" to view the packages attached to your gallery.
After reviewing your options, select the package you want by checking the box. Click "Continue."

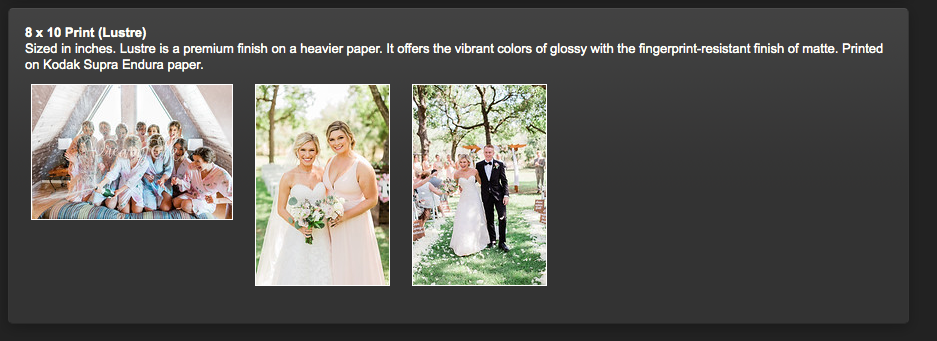
If your package comes with (3) 8x10” prints, three black boxes under the heading 8x10” will display.
Click on any box to select your photos.
In the example below, I get to choose (3) 8x10" prints.
If you want to buy three 8x10's of the same photo, select the same image three times.
Once you have finished selecting all of your photos & filling in the black boxes, click "Add to Cart."
There is a counter at the bottom that tells you how many products you have left to fill before you can purchase it.

adjusting crop
Some sizes will need an adjustment to their crop. The default crop is the very center of each photo.
If you're selecting individual photos, as soon as you pick your size & finish, a crop box will appear around your photo. You can adjust the crop here or in the Shopping Cart by selecting "Edit Crop" next to the photo that needs re-cropping.
If you are confused about cropping,
I check every single order before it goes to the printers!


** warnings **
I do not recommend trying to blow a small portion of a photo up too large as it may result in a pixelated photo or a blurry/soft image.
Not every photo will work in every crop. If there is a photo that you need in a specific size but the crop won’t work, I have a few tricks up my sleeve. Contact me at [email protected] with your request.
coupons
Once you are finished & satisfied with your order, proceed to checkout to fill out payment & shipping information.
If you have a coupon, apply it in the "Coupon Code" box when you reach the Payment Information page.
Your shopping cart should be enabled in your Favorites gallery. In addition, your coupon code should also work in your favorites gallery. If neither of those things are working, please contact me.
Canvas
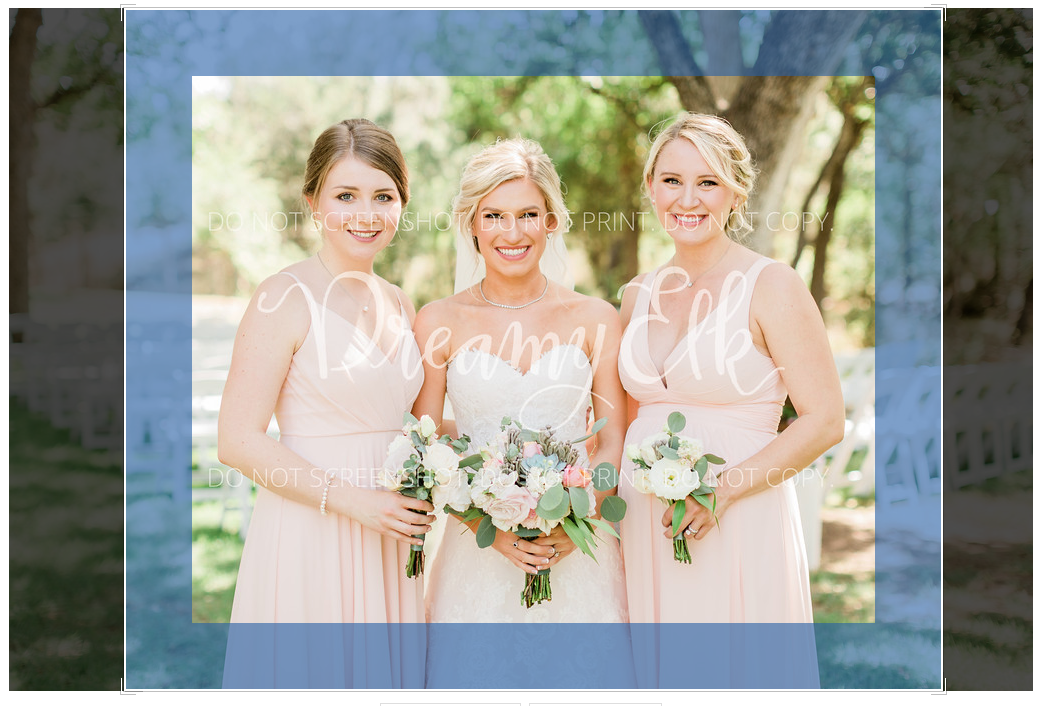
Under “Wall Art” is the option for Canvases. These photographs are printed onto canvas material & stretched around a wooden frame. These come ready to hang with no frame required! When you select this option, you’ll notice a wide blue bar that covers a heavy portion of the photo. The part inside the blue portion will be safely on the front of the image. Everything covered by the blue bar will be on the side of the canvas. Photos with plenty of space around the subject work best for these types of wall displays.
If you want a Canvas but don’t like how the blue bar lands on the image, I can order it for you where the sides of the canvas are white or black & crops like a regular photo print does. Unfortunately you can’t order it yourself.
See some example images of the canvas here along with more wall art options that can be special ordered.